Showing posts with label docker. Show all posts

Monday, December 23, 2019

Scala Mongo example with akka-http and akka-stream

Introduction

In this tutorial we shall create and CRUD web application in Scala. We will use MongoDB Scala Driver to communicate to the mongo database. It is officially supported Scala driver for MongoDB. Along with that we shall create a Rest API using akka-http module and akka-streams.

Prerequisites

  • Scala version: 2.13.1
  • Database: Mongo:3.4.23-xenial

Other dependencies - 


About the service/project

Application should be able to do CRUD operations on the in mongodb document. This application should also provide Rest apis to access and modify the data. So it is an employee management. We have employee details in a document called `employee`. We will create reset services to create, update and search the employee data.

Mongo Configuration

Codec Registry

Mongo documents required the codec information for marshal and un-marshal the data. This codecs are already written and available here. This repository have codec implementations for most of the available types. So first create the the java codec as below -

In the above code `Employee` is our mongo document class with the following details. 

Document Class

Employee document contains employee name and date of birth.

Database Details

`MongoClientSettings` is the companion object to configure the mongodb settings. 

In the above snippet; An Mongo client settings object is created that contains the configuration details for the connecting mongo database.

Collection Details

Collection details can be obtained from the database representation we get the previous step

This above step required for every collection to get the data.

JSON Support

We need formatter to format the date type to and from JSON format. We used Spray JSON here for this. Spray JSON providing automatic to and from JSON marshalling/un-marshalling using an in-scope *spray-json* protocol.

Repository

Repository contains the create, update, delete and search commands for the employee document. 

Actors to get the user data 

Employee actor received messages to perform different operation on the employee document. Actor shall call the actual service and then send the responds to the sender.

Routing Configuration


#1
GET /api/employee/create
To create employee data 
#2 
POST /api/employee/search
To search employee data
#3
PUT /api/employee/update
To update employee data
#4
DELETE /api/employee/delete
To delete user data

The routing code should look like this-


Web Server

This class is used to create http server and bind the endpoints with the http server. You can get more information in my previous blog.

Run Application

Start the mongodb docker container 

`docker-compose up -d`

Compile the code using below command

`sbt compile`
Run the application
`sbt run`
Now go to terminal, and run below https://httpie.org/ commands 

Create Employee Data

Search Employee Data

Update Employee Data

Check current data in mongodb

Update the data by id 

Search data after update 


Delete Employee data

Search employee data

Delete employee data using id

Search data after delete

Github links

Full code is available here to to explore and fork. Feel free to do whatever you want. ;)

Conclusion

We have seen here how to use akka http and streams to create rest services in scala. You can get more information here - 

Wednesday, November 28, 2018

Setup Keycloak with Docker


Introduction of Keycloak
Open Source Identity and Access Management For Modern Applications and Services. It add authentication to applications and secure services with minimum fuss. No need to deal with storing users or authenticating users. It's all available out of the box.

You'll even get advanced features such as User Federation, Identity Brokering and Social Login.
Prerequisites:
Docker:
Since we are using Docker to install Keycloak; it should be installed on your machine. If it is not you can download and install it from the link given below, it’s pretty straight forward.
Create docker compose file
  1. We use keycloak with mysql database to persist the user data.
  2. Use the below docker-compose.yml file to pull and start the docker server

docker-compose.yml


In docker compose file we povide default user name and password for the keycloak use and described in the docker hub for the keycloak image.
  • Our mysql and keycloak server are running on the docker network “Keycloak-network”.
Start keycloak and mysql server
  • Run “docker-compose up” command on the terminal, once the server up you can see the output as below -

  • Go the browser and type the url - http: //localhost:9001 Note: remember we expose the port in the docker-compose file ?

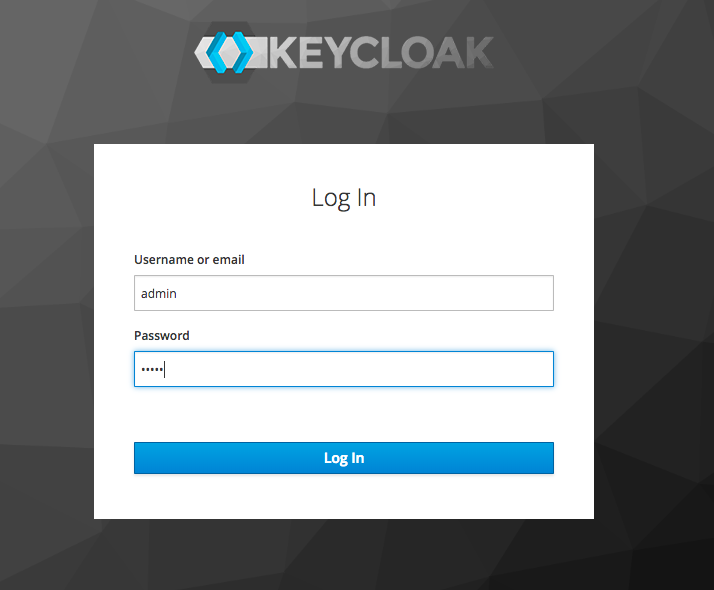
You can now login keycloak from the username and password you provided in docker-compose file. In our case we use username “admin” and password also ‘admin’


After login you will see the default realm ‘master’ as below -

Core concept and terms of keycloak -
Realms:
A realm manages a set of users, credentials, roles, and groups. A user belongs to and logs into a realm. Realms are isolated from one another and can only manage and authenticate the users that they control.

Groups:
Groups manage groups of users. Attributes can be defined for a group. You can map roles to a group as well. Users that become members of a group inherit the attributes and role mappings that group defines.

Clients:
Clients are entities that can request Keycloak to authenticate a user. Most often, clients are applications and services that want to use Keycloak to secure themselves and provide a single sign-on solution. Clients can also be entities that just want to request identity information or an access token so that they can securely invoke other services on the network that are secured by Keycloak.

Client scopes:
When a client is registered, you must define protocol mappers and role scope mappings for that client. It is often useful to store a client scope, to make creating new clients easier by sharing some common settings. This is also useful for requesting some claims or roles to be conditionally based on the value of scope parameter. Keycloak provides the concept of a client scope for this.

Client role:
Clients can define roles that are specific to them. This is basically a role namespace dedicated to the client.

Identity token:
A token that provides identity information about the user. Part of the OpenID Connect specification. You can get more details about this terms here !
Conclusion:
In this blog we learn how to setup keycloak using docker, in next blog we will create an application and secure it using keycloak.

Reference https: